Registrations Guide
Contents
| 1. Candidate (Personal Details, Employment Details, Education Details, Resume List, Cover Letter List, How can we help you) |
| 2. Employer (Personal Details, Company Details, Job Details) |
| 4. Volunteer (Volunteer Info) |
1. Candidate
To access the application, a candidate needs to register. A Candidate must enter his/her profile details like Personal Details, Employment Details, Education Details. Candidate can attach or delete Resume and Cover Letter.
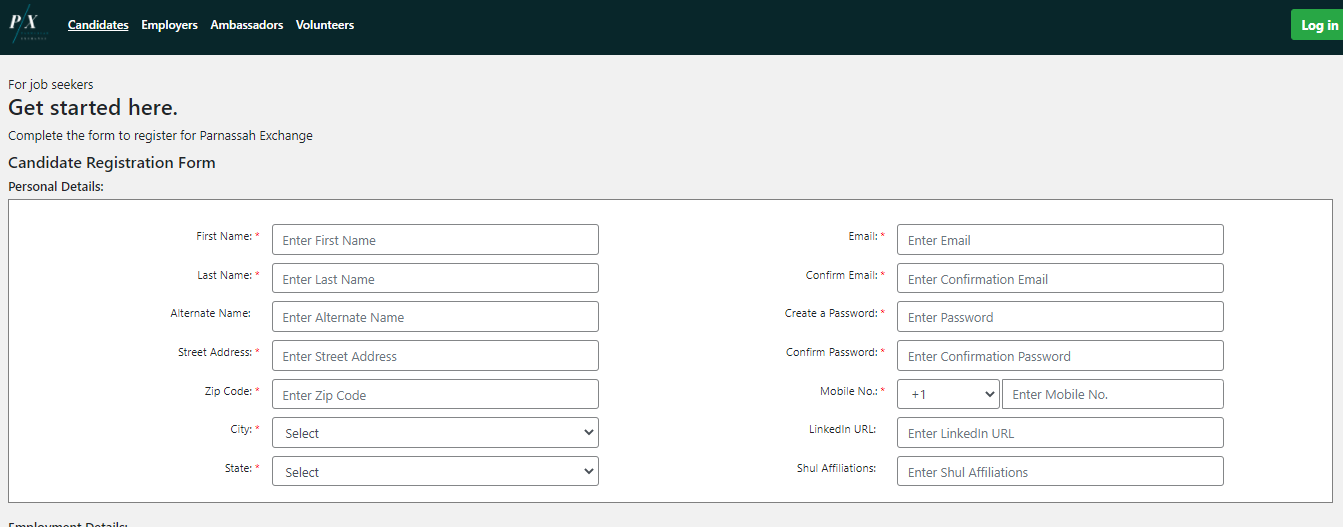
1.1 Personal Details
- Enter the personal details by clicking on the following mandatory fields. First Name, Last Name, Email, Confirm Email, Create a Password, Confirm Password, Mobile No., Street Address and Zip Code.
- Select the relevant values from the drop-down in the City and State field.
- Enter the personal details by clicking on the following optional fields. Alternate Name, LinkedIn URL and Shul Affiliations.
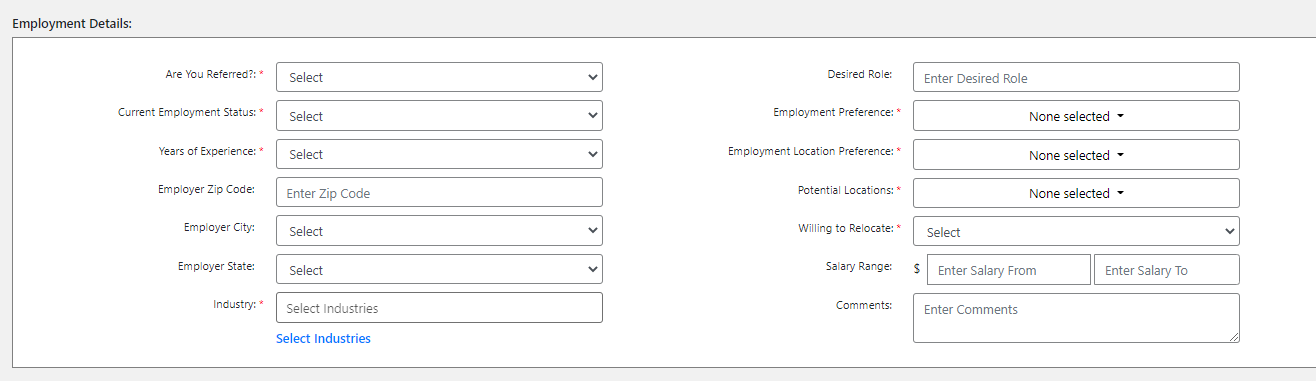
1.2 Employment Details
- Select the relevant mandatory values from the following drop-down Are You Referred?, Current Employment Status, Years of Experience, Industry, Employment Preference, Employment Location Preference, Potential Locations and Willing to Relocate.
- Enter the employment details by clicking on the following optional fields. Employer Zip Code (Employer City and Employer State will fetch automatically), Desired Role, Salary Range and Comments.
- The amount entered in the ‘Salary Range’ field would be comma separated.
1.3 Education Details
- Select the relevant optional values from the drop-down in the ‘Education Level field’.
- Enter the optional details by clicking on the ‘Licenses’ and ‘Certifications’.

1.4 Resume List
- Click on the ‘Add Resume’, to add resume. The system will accept .docx, .doc and .pdf file types.
- Click on the ‘Choose the File’ and select the document.
- If needed enter the ‘Title’ and ‘Description’.

- To add more resumes, click on the ‘Add Resume’ icon and follow the above mentioned steps.
- Click on the ‘Delete’, to delete the added resume.

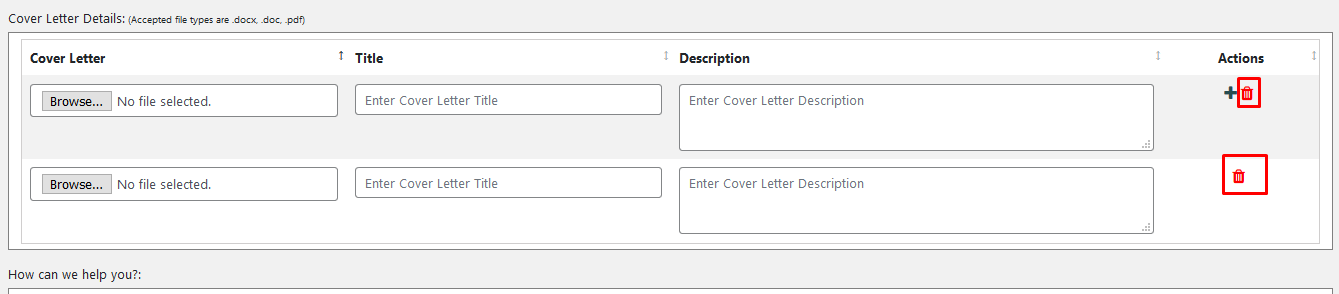
1.5 Cover Letter List
- Click on the ‘Add Cover Letter’, to add the cover letter. The system will accept .docx, .doc and .pdf file types.
- Click on the ‘Choose the File’ and select the document.
- If needed enter the ‘Title’ and ‘Description’.

- To add more cover letter, click on the ‘Add Cover Letter’ icon and the above steps.
- Click on the ‘Delete’, to delete the added cover letter.
1.6 How can we help you
- If needed enter optional information in ‘How can we help you?’.
- Select ‘Accept Terms & Conditions’ to enable register now button and proceed further.
- Click on the ‘Register Now’, candidate creation request will be sent to Admin.

2. Employer
To access the application, an employer needs to register. An Employer must enter his/her profile details like Personal Details, Company Details, Job Details.
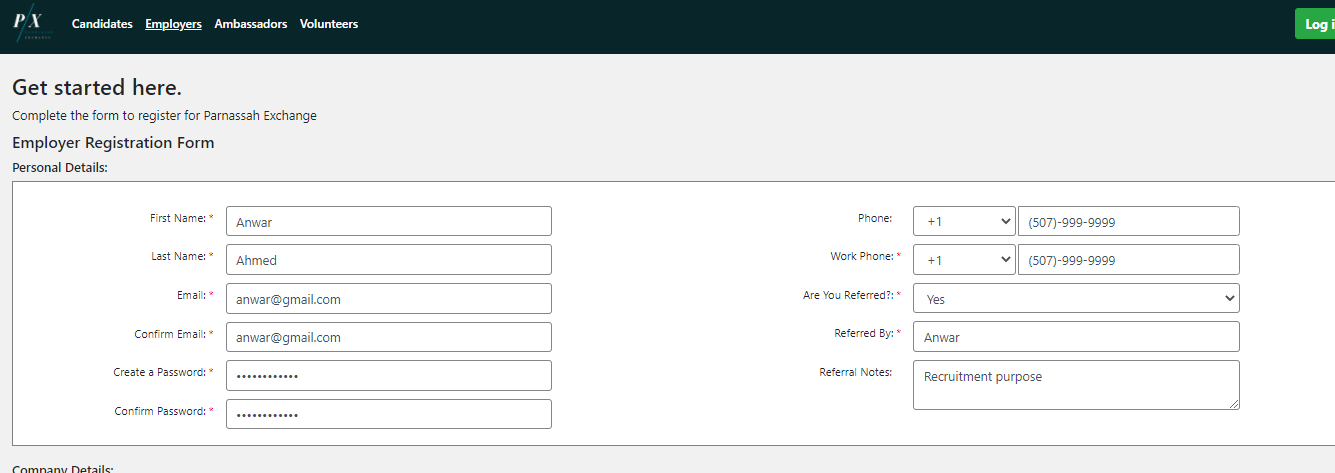
2.1 Personal Details
- Enter the personal details by clicking on the following fields. First Name, Last Name, Email, Confirm Email, Create Password, Confirm Password, Phone and Work Phone.
- Select the relevant values from the drop-down in the field ‘Are You Referred’. If the value is selected ‘Yes’, then user must enter ‘Referred By’. User can also enter ‘Referral Notes’.
2.2 Company Details
- Enter the Company details by clicking on the fields ‘Company Name’, ‘Street Address’, ‘Website’ and ‘Zip Code’.
- Select the relevant values from the drop-down in the ‘City’ and ‘State’ fields.

2.3 Job Details
- Enter the job title by clicking on the ‘Job Title’ field.
- Select the relevant values from the drop-down in the ‘Role Type’, ‘Job Location’, ‘Seniority Level’, ‘Experience Range (Years)’, ‘Industry’, ‘Can Candidate Work Remotely’ and ‘Can Candidate Contact Directly’ fields.
- Enter the comments in the ‘Comments’ field.
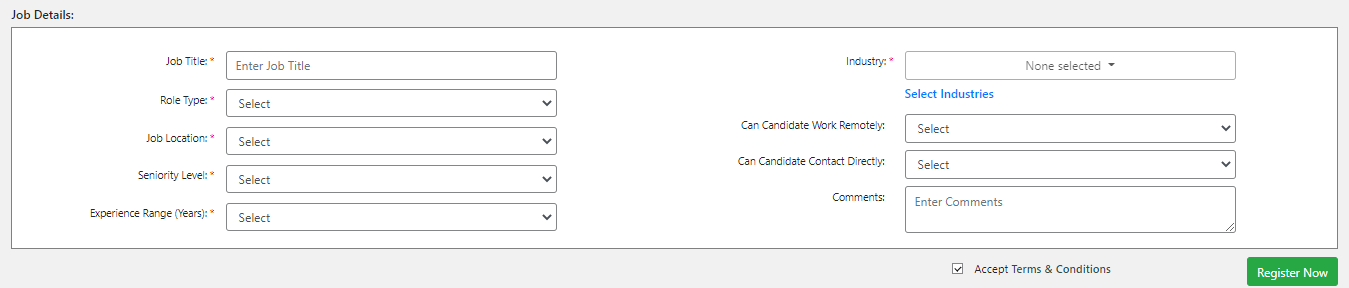
- Tick the ‘Accept Terms & Conditions’.
- Click on the ‘Register Now’, to register as new Employer.

3. Volunteer
To access the application, Volunteer needs to register. A Volunteer must enter his/her profile details.
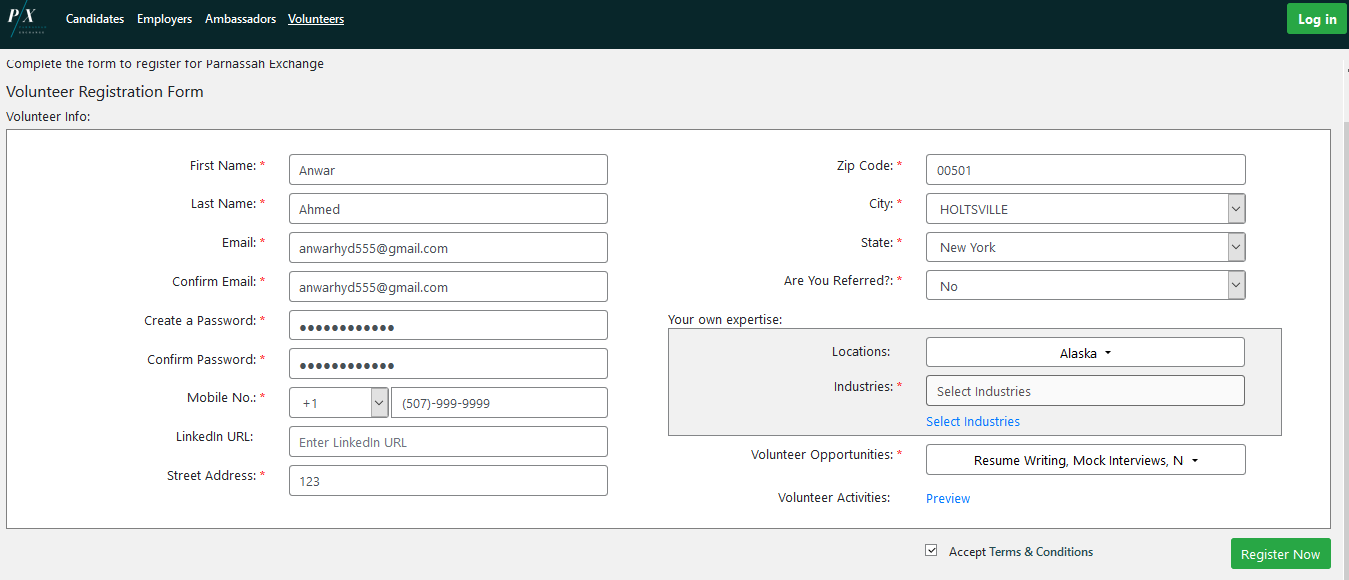
3.1 Volunteer Info
- Enter the mandatory details by clicking on the following fields. First Name, Last Name, Email, Confirm Email, Create a Password, Confirm Password, Mobile No., Street Address and Zip Code (values in the ‘City’ & ‘State’ will fetch automatically based on the ‘Zip Code’).
- Select the relevant values from the drop-down in the mandatory field ‘Are You Referred’. If the value is selected ‘Yes’, then user must enter ‘Referred By’. User can also enter ‘Referral Notes’.
- Select the values from the drop-down in the mandatory fields ‘Industries’ and ‘Volunteer Opportunities’.
- Enter the non-mandatory details in the ‘LinkedIn URL’ and select ‘Locations’.
- Tick the ‘Accept Terms & Conditions’.
- Click on the ‘Register Now’, to register as new Volunteer.